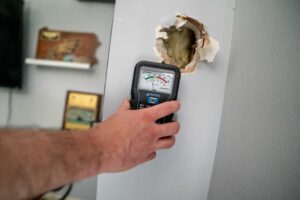
The Truth About Roof Flashing Maintenance
Roof flashing maintenance is probably something you do not think about. Yet, your roof does a lot of heavy lifting to keep your home safe from rain, wind, and everything else Mother Nature throws at it. But here’s the thing, even a top-notch roof has a few weak spots. Anywhere something pokes through or meets up with the roof, like your chimney, skylights, vents, valleys, dormers, and walls, you’ve got a spot that needs a little extra protection. That protection is called roof flashing.
The problem? Most people never give flashing a second thought until water starts dripping into the house. And by then, the damage is usually already done. We’re talking soggy insulation, ruined drywall, rotting framing, and sometimes even mold creeping in behind the scenes.
The good news is that keeping an eye on your flashing is one of the easiest and cheapest ways to stop leaks before they start and get more years out of your roof. Doesn’t matter if your place is brand new or has been around for decades; a few regular checkups and quick fixes can save you thousands down the road.
So, we’ll walk through why flashing fails in the first place, the warning signs worth watching for, how to check it out without putting yourself in danger, and the simple maintenance habits that keep leaks from ever showing up.
What Is Roof Flashing?
Roof flashing is basically a thin strip of metal, usually galvanized steel, aluminum, copper, or lead, that goes around all the spots on your roof where water likes to pool up or sneak in. Think of it as the bodyguard for the tricky areas where things poke through or come together.
Instead of letting rain slip under your shingles and cause trouble, flashing steers that water where it’s supposed to go: toward the gutters and away from the parts of your roof that can’t handle getting wet.
You’ll usually find flashing in spots like:
- Chimneys
- Skylights
- Plumbing vents
- Roof valleys
- Where walls meet the roof
- Dormers
- Roof edges
- HVAC penetrations
And here’s the kicker, if your flashing isn’t doing its job, even a brand-new roof can spring a leak.
Why Roof Flashing Matters
Shingles are great at shedding water, but they can’t seal up every little seam and transition on their own. That’s where flashing steps in. It’s the waterproof bridge that ties your roofing materials to the structure underneath, keeping water out of the gaps.
Staying on top of your flashing goes a long way. It helps:
- Prevent roof leaks
- Protect your attic insulation
- Cut down on mold growth
- Keep your drywall and ceilings in good shape
- Add years to your roof’s life
- Stop wood rot before it starts
- Save you from pricey repairs
- Boost your home’s overall value
Here’s the thing a lot of folks miss: they’ll swap out old shingles but leave the tired, worn-down flashing right where it is. And that’s a problem, because bad flashing is behind a surprising number of roof leaks.
Common Types of Roof Flashing
Once you know the different pieces of flashing on your roof, checking things over gets a whole lot easier. So let’s break down the main types you’ll run into, no engineering degree required.
Step Flashing
This is the flashing you’ll find where your roof bumps up against a vertical wall. It’s made up of little metal pieces that overlap each other, tucked in between each row of shingles like a set of stairs. That layered setup is what keeps water from sneaking in along the wall.
Counter Flashing
You’ll usually spot this one around chimneys. Counter flashing sits over the top of your step flashing, adding a second line of defense. Think of it as a backup layer — one more thing standing between your home and a leak.
Valley Flashing
Roof valleys are those V-shaped spots where two slopes meet, and boy, do they get a ton of water running through them during a storm. Valley flashing lines those channels so all that rushing water flows right off instead of soaking into your roof.
Vent Pipe Flashing
Got plumbing vents poking up through your roof? Those need a little collar around them, and that’s exactly what vent pipe flashing does. It’s usually a rubber or metal boot that hugs the pipe and keeps water from creeping in around the opening.
Drip Edge Flashing
This one runs along the edges of your roof. Its job is pretty simple, but important; it guides water straight into your gutters and keeps it from sneaking under the edge and rotting out your roof decking.
Skylight Flashing
Skylights are great for letting the sunshine in, but the seams around them are prime real estate for leaks. Skylight flashing is a special system built to seal up that whole perimeter, so you get the natural light without any surprise drips.
Why Flashing Fails
Here’s the not-so-fun truth: even the best flashing money can buy won’t last forever. Given enough time and enough weather, it’s going to wear down. Let’s look at what usually knocks it out of commission.
Weather Exposure
Your roof takes a beating all year long, blazing sun, pouring rain, snow, ice, you name it. And every time the temperature swings up and down, the flashing expands and contracts a little. Do that thousands of times over the years and things slowly start to give.
Corrosion
Metal flashing can rust and corrode, especially once the protective coating starts wearing thin. Once that happens, it’s kind of a downhill slide, the metal weakens and stops doing its job the way it should.
Sealant Breakdown
Is that caulking and roofing sealant holding everything snug? It doesn’t stay fresh forever. Over time, it dries out, cracks, and loses its grip. And once the seal goes, water finally has a way in.
Wind Damage
Strong winds can be sneaky. A good gust can loosen your flashing or lift the shingles around it, opening up little gaps you’d never notice from the ground.
Poor Installation
Sometimes the problem starts on day one. If the flashing wasn’t overlapped correctly, the wrong fasteners were used, or somebody skimped on the sealant, you can end up with leaks way sooner than you should.
Aging Roof Materials
And of course, everything ages together. As your shingles get older and start to break down, the connections around your flashing can weaken and pull apart, giving water yet another chance to sneak through.
Warning Signs Your Flashing Needs Attention
The trick with flashing problems is catching them early. A little issue you spot today is a whole lot cheaper to fix than the big mess it turns into if you ignore it. So it pays to know what to look for.
Here are the red flags worth keeping an eye out for:
- Water stains on your ceilings: those yellowish-brown blotches that seem to show up out of nowhere
- Damp attic insulation: if it feels soggy or looks matted down, water’s getting in somewhere
- A musty, moldy, or mildewy smell: your nose often catches trouble before your eyes do
- Rusted flashing: a sure sign the metal’s seen better days
- Missing sealant: if the caulking’s cracked, crumbling, or just plain gone
- Loose flashing pieces: anything that’s wiggly or lifting away from the roof
- Lifted shingles: especially the ones near walls, chimneys, or vents
- Visible gaps: little openings where water can slip right through
- Water pooling around your chimney: a classic weak spot for leaks
- Discoloration on your interior walls: those faint stains creeping down from the ceiling
Notice any of these hanging around? Don’t just shrug it off and hope it goes away. Take a few minutes to check things out yourself, or better yet, give a trusted roofing contractor a call and let them take a look. A quick inspection now can save you a serious headache and a serious bill later on.
Seasonal Roof Flashing Maintenance Checklist
Here’s a little secret: staying on top of your flashing is way easier when you break it up by season. Instead of one giant, overwhelming to-do list, you just knock out a few quick checks a few times a year. Let’s walk through what to look at and when.
Spring
Winter is rough on your roof; all that ice, snow, and freezing cold really does a number on things. So once the weather warms up, give your flashing a good once-over and look for:
- Loose flashing
- Ice damage
- Rust
- Missing fasteners
- Sealant that’s dried out or cracking
While you’re at it, clear out any leaves and gunk that piled up in your valleys and gutters over the winter. That stuff traps water, and trapped water is basically an open invitation for leaks.
Summer
Warm, dry days are perfect for climbing up and taking a closer look (safely, of course). This is the season to check for:
- Expansion cracks
- Dry, crumbly sealant
- Sun and UV damage
- Fasteners that are poking out or coming loose
And here’s a pro tip: if you spot anything that needs fixing, handle it now before hurricane or storm season rolls in. Trust me, you don’t want to be scrambling to patch things up right as a big storm is bearing down.
Fall
Fall is all about getting your roof ready for the cold months ahead. Take some time to inspect:
- Your chimney flashing
- Roof valleys
- Skylights
- Pipe boots
Rake or blow off any leaves sitting on the roof, since they love to trap moisture right up against your flashing. And if you’ve got tree branches hanging over the house, trim them back in a good storm, and those branches can scrape up your roofing or snap right off onto it.
Winter
Snow and ice pile on the stress, so winter checks are important, but do them smart. After any nasty weather, stand back and inspect from the ground for:
- Ice dams building up along the edges
- Loose or lifting metal
- Fallen branches
- Flashing that’s clearly shifted or out of place
One big rule here: never climb onto an icy roof. Seriously. No leak is worth a trip to the ER. If something looks off and you can’t get a good look from the ground, that’s exactly what a roofing pro is for.
How to Inspect Roof Flashing Safely
Before we get into the nitty-gritty, let’s talk safety because no leak is worth taking a tumble off your roof.
A few ground rules before you climb up:
- Set up a solid, stable ladder on level ground
- Wear shoes with good, non-slip soles
- Skip it if the roof’s wet or slick
- Never head up there when it’s windy
- Bring a buddy along to spot you
And here’s the honest truth: if your roof is steep or just plain awkward to get to, don’t play hero. Call a pro. They’ve got the gear and the experience to handle it safely, and it’s a whole lot cheaper than a hospital visit.
Once you’re up there (safely!), here’s what to check in each trouble spot.
Chimneys
Chimneys are a classic weak point, so give them a good look. Keep an eye out for:
- Cracked mortar
- Rust
- Counter flashing that’s come loose
- Missing or crumbling sealant
Pipe Boots
Those rubber collars around your plumbing vents? They tend to wear out faster than just about anything else up there, often long before the shingles around them start to go. So look closely for:
- Cracking
- Splitting
- Sun and UV damage
If one’s looking rough, it’s usually an easy fix and well worth catching early.
Roof Valleys
Valleys handle a ton of water, so clear out any leaves and debris first, then check for:
- Rust
- Corrosion
- Open or separating seams
Skylights
Skylights are great until they start leaking. Pay attention to the corners of the flashing and look for:
- Gaps
- Loose fasteners
- Water staining
Maintenance Tips That Prevent Leaks
Here’s some good news: keeping your flashing in shape usually isn’t about big, expensive repairs. Most of it is just simple upkeep the kind of stuff you can knock out in an afternoon. Stay on top of these little things and you’ll head off leaks before they ever get a chance to start.
Keep Your Gutters Clean
When your gutters clog up and overflow, all that water has to go somewhere and it often ends up backing up under your flashing. Not great. Give them a good cleaning at least twice a year and you’ll save yourself a lot of grief.
Clear Off Roof Debris
Leaves and gunk sitting on your roof hold onto moisture, and that moisture speeds up corrosion. So don’t let debris just pile up there, sweep or blow it off whenever you notice it building up.
Swap Out Worn Sealant
Good sealant should stay soft and flexible so it can move with your roof. Once it dries out, gets brittle, or starts cracking, it’s not doing its job anymore. When you spot that, go ahead and replace it right away.
Tighten Loose Fasteners
Over time, wind and vibration can work your flashing’s nails and screws loose. Check them now and then, and if any are missing or wiggly, swap in corrosion-resistant fasteners so they’ll actually hold up.
Deal With Rust Right Away
Catch rust early and it’s usually no big deal; you can often just clean it up and treat it before it turns into a real problem. Let it sit, though, and it’ll keep spreading until you’re looking at a full replacement.
Fix the Little Stuff Fast
This is the big one. A small issue you handle today is cheap and quick. Ignore it, and that same little problem tends to snowball into a pricey restoration job down the road. When it comes to flashing, a stitch in time really does save nine.
How Often Should Roof Flashing Be Inspected?
Great question and the good news is you don’t need to be up on the roof every weekend. Here’s what most roofing pros suggest:
- Give it a look twice a year. A quick visual check in the spring and fall is usually plenty to catch anything that’s starting to go sideways.
- Check again after any nasty storm. Big wind, hail, heavy snow that kind of weather can shake things loose or do damage in a hurry, so it’s worth a look once it clears up.
- Bring in a pro every three to five years. A trained set of eyes will spot the little stuff you might miss from the ground.
And if your roof is getting up there in years, it’s not a bad idea to have a professional take a peek every year. Older roofs just tend to need a little more attention, and staying ahead of problems beats scrambling to fix a leak later.
Mistakes Homeowners Should Avoid
Even with the best intentions, it’s easy to make a few slip-ups that end up cutting your flashing’s life short. Here are the big ones worth steering clear of.
Ignoring Small Leaks
That tiny drip you keep meaning to look at? It hardly ever stays tiny. Little leaks have a sneaky way of turning into big, expensive messes when you leave them alone. Catch it early and save yourself the headache.
Using Household Caulk
Grabbing that tube of general-purpose caulk from the junk drawer feels like an easy fix, but it’s really not built for life on a roof. It won’t hold up to the weather, and before long you’re right back where you started. Use a proper roofing sealant instead.
Walking Excessively on the Roof
Your roof isn’t a hangout spot. Every trip up there puts pressure on your shingles and can jostle your flashing loose. Keep the foot traffic to a minimum and only go up when you actually need to.
Delaying Repairs
Putting off a repair is one of the worst things you can do, because water moves fast once it sneaks under your roofing materials. What could’ve been a quick fix turns into a spreading problem practically overnight. Handle it while it’s small.
Painting Over Rust
Slapping a coat of paint over rust might make it look better for a hot minute, but it doesn’t actually fix anything. The corrosion keeps chewing away underneath you’ve just hidden it. Deal with the rust for real instead of covering it up.
The Cost of Neglect
Here’s what letting your flashing slide can actually cost you. When water gets in and starts doing its thing, you could be looking at:
- Ceiling repairs
- Drywall replacement
- Mold remediation
- Structural wood repairs
- Insulation replacement
- Electrical damage
- Interior painting
- Roof deck replacement
That’s a whole pile of expensive, disruptive work, and none of it is fun. Now here’s the kicker: a simple flashing repair usually costs just a tiny fraction of fixing all that water damage. So do yourself a favor and take care of the little stuff now. Your wallet (and your weekends) will thank you later.
Choosing the Right Roofing Contractor
So the time has come to bring in some help, no shame in that. But not every contractor is the right fit for flashing work, so it pays to be a little picky. You want someone like FastPro who actually knows their way around flashing systems, not just someone who slaps on shingles and calls it a day.
Here’s what to look for before you hand anyone your money:
- Proper licensing: make sure they’re legit and licensed to work in your area
- Insurance coverage: this protects both you and their crew if something goes sideways
- Manufacturer certifications: these show they’ve been trained to install products the right way
- Positive customer reviews: a quick peek at what other folks are saying tells you a lot
- Detailed written estimates: you want everything spelled out, not scribbled on a napkin
- Warranty information: good work should come with a promise to back it up
And here’s one question a lot of homeowners forget to ask: are they actually going to repair or replace the damaged flashing, or just glob some sealant over it and call it fixed? Resealing might buy you a little time, but it’s often a band-aid on a bigger problem. You want a contractor who’ll do it right, not just make it look good for a few months.
Final Thoughts
Your flashing doesn’t get much love. It’s tucked away in the corners and crevices of your roof, quietly doing one of the most important jobs up there, keeping water out of your home. Yet most people never give it a second thought until something goes wrong. And by then, you’re usually dealing with a much bigger mess.
Staying on top of your flashing pays off in a big way. Regular upkeep protects your home from leaks, mold, wood rot, ruined insulation, and those wallet-crushing structural repairs nobody wants to face. Check it each season, sweep off the debris, swap out sealant when it starts to go, and jump on small problems before they grow. Do that, and you’ll stretch the life of both your flashing and your whole roof.
Bottom line? A little prevention now almost always beats an emergency repair later. Whether your roof is five years old or pushing twenty-five, taking action today can save you a ton of time, money, and frustration down the road.
If you’re not sure what shape your flashing is in, don’t guess. Go ahead and schedule a professional roof inspection. A small investment now can save you from a whole lot of water damage later. Your future self will thank you.
Frequently Asked Questions
What is roof flashing maintenance?
Roof flashing maintenance involves inspecting, cleaning, repairing, and replacing flashing around chimneys, skylights, vents, valleys, and roof edges to prevent water intrusion.
How often should roof flashing be inspected?
Inspect flashing at least twice a year and after major storms. Professional inspections every three to five years are also recommended.
What causes flashing to fail?
Age, corrosion, weather exposure, poor installation, wind damage, and deteriorated sealants are the most common causes.
Can damaged flashing cause roof leaks?
Yes. Flashing failures are among the leading causes of roof leaks because water enters around roof penetrations and transitions.
Is flashing replaced when installing a new roof?
Not always. Flashing should be inspected carefully and replaced if it shows signs of deterioration or damage.
Can I repair flashing myself?
Minor maintenance like cleaning debris or replacing small amounts of sealant may be manageable, but major repairs should be handled by a qualified roofer.
What material lasts the longest for roof flashing?
Copper generally has the longest lifespan, while galvanized steel and aluminum are durable, cost-effective options when properly maintained.
How can I tell if flashing is leaking?
Common signs include ceiling stains, damp attic insulation, peeling paint, mold growth, and visible rust or gaps around flashing.
Does homeowners' insurance cover flashing repairs?
Insurance may cover flashing damage if it results from a covered event such as wind or hail, but normal wear and tear is typically excluded.
Why is roof flashing maintenance important?
Regular roof flashing maintenance helps prevent leaks, protects your home’s structure, extends roof life, reduces repair costs, and minimizes the risk of water damage and mold.